How to Plant a Birch Tree Beside a Road: Site Prep, Spacing, and Staking
How to prepare a compacted verge, space birches for their mature crowns, and stake only when a roadside tree truly needs support.
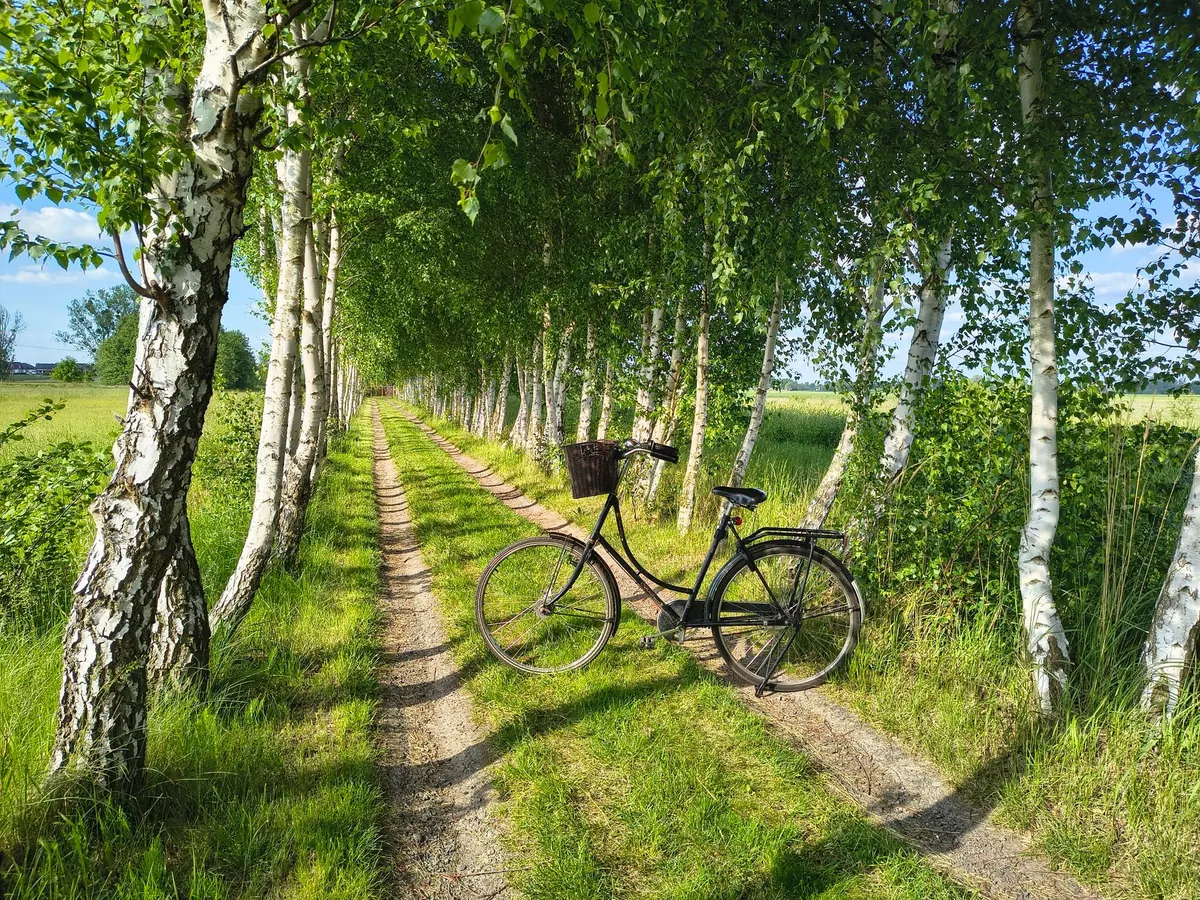
A birch beside a road can be a beautiful accent, a softening line along a curb, or a small grove that marks a neighborhood entrance. It can also fail quickly if it is planted like a tree in a open lawn. Roadside verges are compacted, salty, hot, windy, and often narrow. They may hide utilities, interrupt sightlines, and receive more foot traffic and mower damage than a backyard planting ever would. Success starts before the shovel goes into the ground: assess the site, choose a birch that fits the space, prepare the soil and drainage, space the tree for its mature crown, and use staking as a temporary tool rather than a permanent crutch.
Start with a Roadside Reality Check
Before you fall in love with a particular birch, look at the actual planting strip. Measure the distance from the curb to the sidewalk, from the sidewalk to the property line, and from the intended trunk to any overhead wires, driveways, signs, and streetlights. A verge that looks generous in winter can feel very small once a mature crown is overhead.
- Utilities: Call the local utility locating service before digging. Keep the root ball well away from buried electric, gas, water, sewer, and communications lines.
- Sightlines: Do not plant inside a driveway sight triangle or anywhere the crown will block a driver’s view of pedestrians, signs, or intersections.
- Road salt: Plow piles and salty runoff are common killers of roadside trees. Avoid low spots where deicing spray collects.
- Compaction: A verge that has been parked on, walked on, or graded during road work may have soil as hard as pavement below the surface.
- Clearance: Check local ordinances for street-tree setbacks, right-of-way rules, and permit requirements. A tree in the public right-of-way may need approval.
A narrow verge is not automatically a planting site. A four-foot strip between curb and sidewalk is usually too tight for a medium or large birch. A ten-foot verge may work for a smaller cultivar if the mature spread is modest and the tree is placed carefully. If the space cannot accommodate the crown and root zone, choose a smaller tree or a different location. The right tree in the wrong place becomes expensive maintenance.
Choose a Birch That Fits the Verge
Birches are not interchangeable. They range from compact ornamental selections to large native trees with broad crowns and aggressive root systems. Match the mature height and spread to the site, and give special attention to disease resistance and heat tolerance.
- Silver birch (Betula pendula): Often 40 to 50 feet tall with a 25- to 35-foot spread. Beautiful white bark, but it prefers cool, moist, well-drained soil and can struggle in hot, dry roadside conditions.
- Paper birch (Betula papyrifera): A larger native tree, often 50 to 70 feet tall with a broad crown. It is a poor fit for narrow verges and hot, compacted sites.
- River birch (Betula nigra): More tolerant of heat and wet soil than many birches, but it can become a large, wide tree. Use it only where there is room for a 40- to 60-foot spread.
- Whitespire Japanese white birch: A smaller selection, often around 40 to 50 feet tall with a narrower 20- to 25-foot spread. It can be a better choice for a spacious verge, though it still needs reliable moisture.
- Clump birches: Multi-stem forms are handsome, but they are wider at the base and can collect debris, snow, and salt spray. Treat the clump as one wide tree when calculating spacing.
Do not choose a birch solely for its bark. Ask whether the tree is known to perform well in your climate, whether it is prone to bronze birch borer or leafminer, and whether the site can supply consistent moisture without standing water. A healthy, slightly less dramatic birch is better than a stressed specimen that declines after three seasons.
Site Prep: Fix the Verge Before You Plant
Test and Improve the Soil
Birches generally prefer moist, well-drained, acidic soil. A soil test is worth the modest cost, especially if the verge has been limed, graded, or used for road work. Test pH, organic matter, and drainage. Do not add lime unless the test clearly calls for it, and do not assume that compost will fix every problem.
Dig the planting hole two to three times as wide as the root ball, but no deeper than the root ball. In compacted soil, break up a wider area around the hole with a fork or spade, ideally a circle three to five feet across for a small tree. This loosened zone gives new roots a place to move. Use the native soil as the main backfill, mixed with a modest amount of compost if the soil is very poor. Do not create a rich, loose “flowerpot” of amended soil surrounded by hard ground.
Manage Drainage and Compaction
Check drainage before planting. Dig a test hole about the depth of the root ball, fill it with water, and watch how quickly it drains. If water stands for many hours, choose a different spot or plant on a slight raised mound so the root flare sits above the surrounding grade. Birch roots need oxygen, and poorly drained roadside soil can kill a tree slowly.
Remove turf and weeds from a ring at least three feet wider than the root ball. Mulch with two to three inches of organic material, keeping it a few inches away from the trunk. Do not build a volcano of mulch against the bark. A clean, flat mulch ring reduces mower damage, conserves moisture, and moderates soil temperature.
Plan for Salt, Spray, and Equipment
Roadside trees need protection from more than drought. Avoid planting in the snow-storage zone where plows push salty slush. If the site receives heavy winter spray, consider a temporary physical barrier or burlap screen, but do not wrap the trunk tightly. In spring, water deeply to help flush salts through the soil. Keep mowers and string trimmers away from the trunk; a young birch’s thin bark is easily wounded. A mulch ring is the simplest long-term protection.
Spacing: Plant for the Crown You Will Have, Not the Tree You Buy
The most common roadside spacing mistake is planting for the nursery tree instead of the mature tree. A five-foot sapling may look lonely beside a road, so people plant it too close to the curb or to another birch. Ten years later, the crown is over the traffic lane and the trunks are competing. Use the mature spread as your guide.
A practical rule is to set the trunk so that the mature crown edge stays at least three to five feet from the curb, sidewalk, or travel lane. In simple terms, leave at least half the mature spread plus a few feet of clearance. For a birch with a 20-foot spread, the crown radius is about 10 feet, so a trunk set 12 to 14 feet from the curb leaves a small buffer. For a tree with a 30-foot spread, the radius is 15 feet, so a 17- to 20-foot setback is more realistic. If the verge cannot provide that, the tree is too large for the site.
Distance from curb, sidewalk, and utilities
- Curb or travel lane: At least half the mature spread plus three to five feet where possible. Never plant where the crown will block signs or sightlines.
- Sidewalk: Keep the trunk several feet from the walk and allow crown clearance overhead. Check local standards for street trees.
- Overhead wires: Choose a tree whose mature height stays below the wires, or plant outside the utility easement. Birches are often too tall for tight wire zones.
- Underground utilities: Call before you dig and keep the root ball away from lines. Roots and pipes do not mix well.
- Buildings and fences: Leave at least half the mature spread plus five feet for air movement and maintenance access.
For multiple birches, space single-stem trees center to center at roughly the mature spread plus five to ten feet. Two 25-foot-spread birches should usually be 30 to 35 feet apart. A large river birch with a 40-foot spread needs even more room. If you want a grove effect, plant in odd-numbered groups only where the site is wide enough; do not crowd stems together and hope they will “sort themselves out.” Clump birches should be treated as one wide tree when spacing them from pavement or other plants.
Plant for the canopy you will have in fifteen years, not the nursery pot you are carrying today.
Planting Step by Step
- Water the root ball thoroughly before planting.
- Dig a wide hole and confirm that the root flare—the point where the trunk widens into the roots—will sit at or slightly above the surrounding soil line.
- Remove wire, burlap, and rope from the top and sides of the root ball. Cut away circling roots if the nursery advises it.
- Set the tree straight, backfill with native soil in stages, and water as you go to settle air pockets.
- Build a shallow watering basin around the root ball, then mulch without touching the trunk.
- Water deeply again and check the tree for plumb after the soil settles.
- Stake only if the root ball is loose, the tree is large or bare-root, or the site is exceptionally windy.
Staking: A Temporary Tool, Not a Permanent Crutch
Most birches do not need stakes. A young tree that can sway gently develops a stronger trunk and better root anchorage. Stake only when there is a real reason: a bare-root tree with a small root system, a large container tree that shifts in the wind, a very exposed roadside site, or loose soil that cannot hold the root ball. Never stake a tree simply because it looks tidy.
Use two stakes placed outside the root ball, one on each side of the prevailing wind. Drive them deeply enough to be stable. Attach wide, flexible ties below the lowest main branches, using a figure-eight loop or a purpose-made tree tie that allows some movement. Do not use wire, rope, or hose directly against the bark, and never nail anything into the trunk. The tree should be supported, not clamped.
How to stake correctly
- Place two sturdy stakes about 18 to 24 inches from the trunk, outside the root ball.
- Drive each stake at least two feet into firm ground.
- Use wide, flexible ties at a point below the lowest branches.
- Leave enough slack for the trunk to sway slightly.
- Inspect the ties monthly for rubbing or girdling.
- Remove the stakes and ties after one growing season, or sooner if the tree is stable.
Leaving stakes on for years can weaken the trunk, damage bark, and create a tree that cannot stand on its own. Mark the removal date on your calendar. A birch that still needs support after a full season usually has a root or planting problem that should be investigated.
Watering and Aftercare on a Roadside Site
New roadside birches need deep, regular watering for the first two to three years. Aim for a slow soak that reaches the full root ball, then let the top inch or two of soil dry before watering again. Light daily sprinkling encourages shallow roots and does little for a tree in hot pavement conditions. During drought, water once a week or more often in extreme heat, and water in the morning so foliage can dry before night.
Do not fertilize a newly planted tree unless a soil test calls for it. Keep the mulch ring refreshed, protect the trunk from equipment, and prune only dead, damaged, or crossing branches. Birch sap can bleed heavily in late winter and spring, so avoid major pruning then; late summer or dormant-season pruning is generally safer. Watch for yellowing leaves, dieback, and borer damage, and act early if the tree looks stressed.
Extra Section: Designing a Roadside Birch Planting That Lasts
A single birch can be striking, but a small grove needs more planning than a solitary tree. Keep the design simple: a mulch bed or low groundcover around the root zone, enough open space for the crown, and no fencing or signs that will interfere with maintenance. Avoid planting right against a guardrail or signpost. Leave room for a person to water, inspect, and remove stakes without stepping into traffic.
If the verge is wide enough, combine birches with low, salt-tolerant perennials or grasses that will not compete aggressively for water. Keep the area near the trunk clear. Do not use weed-and-feed lawn products near the tree, and do not pile extra soil over the root flare during later landscaping. A roadside birch planting succeeds when the tree has room above ground and a protected, uncompacted root zone below ground.
Extra Section: Safety, Legal, and Neighbor Considerations
Street trees are public-facing trees. Check whether the planting strip is private property, a public right-of-way, or a shared easement. Some communities require permits, approved species lists, or minimum setbacks from curbs and utilities. A tree that blocks a stop sign, streetlight, driveway, or pedestrian path can become a liability. Keep lower branches pruned for clearance as the tree grows, and remove dead wood promptly.
Also consider leaf litter, sap, and shade. Birch leaves are small and break down reasonably well, but they can stain pavement when wet. In a snowy climate, the tree may interfere with plow access if planted too close to the curb. Talk with neighbors before planting near a property line, and keep the mature crown in mind. Good roadside planting is not just horticulture; it is also good manners and safe design.
Final Check Before You Dig
- Is the verge wide enough for the birch’s mature spread?
- Have you called for utility locates and checked local tree rules?
- Is the soil compacted, poorly drained, or contaminated with salt?
- Can you provide deep watering for the first two to three years?
- Will the trunk and crown stay clear of traffic, signs, wires, and sidewalks?
- Do you have a plan to remove stakes after one growing season?
A birch beside a road is not an impossible planting, but it is a demanding one. Prepare the compacted verge, choose a species or cultivar that fits the mature space, set the trunk back from pavement, and stake only when support is genuinely needed. Do those things well, and the tree has a far better chance of growing into the graceful roadside accent you intended.
Photo: Pexels / Pixabay